

Apple introduces Mobile Device Management (MDM) settings, designed to oversee Apple devices like iPhone, iPad, Mac, Apple TV, and iPod touch. These devices come equipped with an inherent framework that facilitates mobile device management. Through the transmission of profiles and commands to the device, administrators gain the ability to remotely regulate and monitor device activities.
However, these imposed restrictions can sometimes lead users to experience a degree of inconvenience when using an iPhone or iPad with MDM settings. If you find yourself wondering whether it’s possible to eliminate the MDM profile on an iPhone, the answer is affirmative. There are three methods should assist in the removal of MDM from an iPhone without requiring a password or risking data loss. Let’s delve into the steps for removing MDM and enhancing user convenience.
part 1: Removing MDM from iPhone Without Data Loss
Opting for an iPhone MDM removal proves to be a practical solution when dealing with MDM issues without detailed knowledge. This method ensures the complete elimination of the MDM profile on your device. If you’re considering this approach, follow the steps outlined below.
1.1 iPhone MDM Removal – MagFone iPhone Unlocker
MagFone iPhone Unlocker stands out as a remarkable and professional tool crafted to address a range of iOS and iPadOS unlocking challenges. This versatile tool not only eradicates MDM restrictions on iPhone, iPad, and iPod touch but also tackles issues like Apple ID and Screen Time passcode removal. Moreover, it is capable of unlocking iOS devices in various scenarios and eliminating diverse screen locks, including 4-digit and 6-digit passcodes, Touch ID, and Face ID. The comprehensive capabilities of MagFone iPhone Unlocker make it the ideal choice for resolving your MDM-related concerns.
1.2 Deleting MDM Profile on iPhone Using MagFone iPhone Unlocker
Learn how to eliminate the MDM profile from your iPhone with the assistance of MagFone iPhone Unlocker by following this tutorial. Once you’ve downloaded and installed MagFone iPhone Unlocker on your computer, proceed with the steps outlined below.
Step 1: Launch MagFone and Connect iPhone to Computer
Commence the process by connecting your iPhone to your computer using a USB cable. Open MagFone iPhone Unlocker, and once your device is detected, navigate to the MagFone iPhone Unlocker interface and select “Remove MDM.”
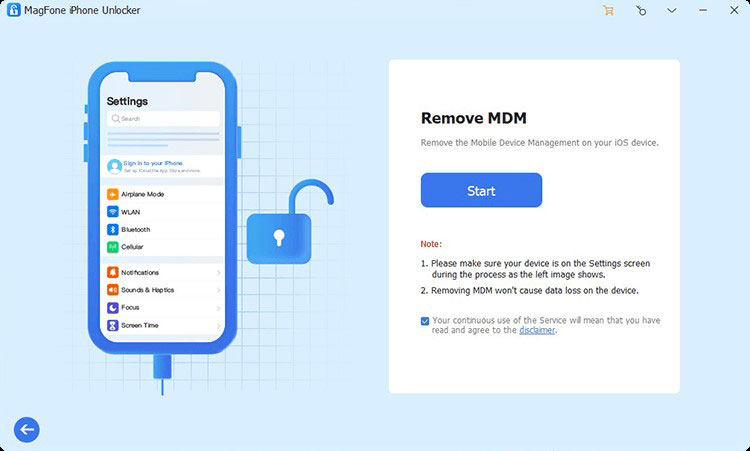
Step 2: Deleting MDM Profile on iPhone Without Password
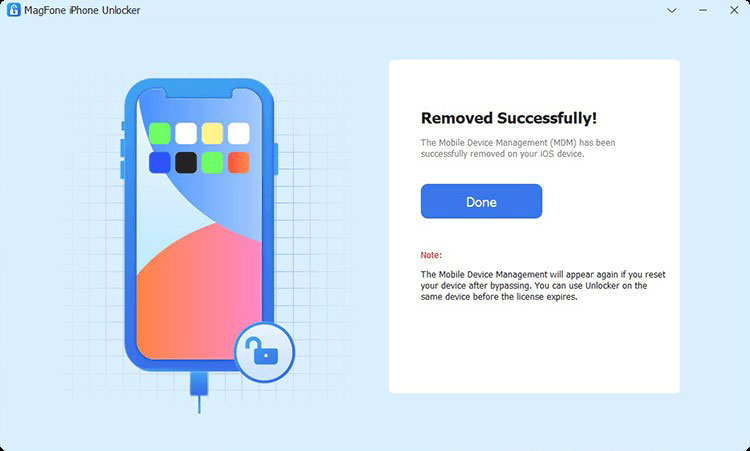
To successfully bypass MDM on your iPhone, ensure that you have disabled the Find My feature on your device. Click the Start button in MagFone iPhone Unlocker to initiate the removal of MDM restrictions from your iPhone. Subsequently, the MDM restriction on your device will be completely removed.
Note: To disable Find My iPhone, access Settings > Your Device > Find My, tap Find My iPhone, and enter your Apple ID password.
Part 2: Removing MDM Device Management on iPhone
While MagFone iPhone Unlocker offers a viable solution for removing iPhone MDM, it’s not the sole remedy. If you’re seeking an option to delete MDM without a password and without data loss, consider exploring other methods. Here are two alternative approaches to help you eliminate mobile device management on your device.
2.1 Disable Device Management via iPhone Settings
The most straightforward method to remove device management on an iPhone involves disabling it in Settings using the device passcode. If you have access to the administrator, follow these steps:
Step 1: Navigate to Settings > General on your iPhone and tap “Device Management.”
Step 2: Under Device Management, locate and tap your MDM profile.
Step 3: Tap “Remove Management” at the bottom of the screen and enter the passcode when prompted.
Step 4: Confirm the removal by tapping “Remove Management” again, and the MDM profile will be successfully removed from your device.
2.2 Delete Device Management through Jailbroken iPhone
Jailbreaking an iPhone can remove device management without a password, but it comes with potential risks such as virus attacks, data loss, and device errors. If you are willing to accept these risks, you can try the following steps:
Step 1: After downloading and installing Checkra1n software on your Mac computer, it will automatically run.
Step 2: Expose the port of your iPhone using iProxy, and then establish a Secure Shell (SSH) connection into your device via a USB cable.
Step 3: Once connected to SSH, run “cd../../” to enter the root directory of the device.
Step 4: Run “cd /private/var/containers/Shared/SystemGroup/” to navigate to the folder where MDM files are stored.
Step 5: Execute “rm -rf systemgroup.com.apple.configurationprofiles/” to delete all MDM profiles on the device.
Step 6: Restart your device, and you will need to set it up again. After the setup, update it to the latest iOS version and install an MDM profile without any pre-configuration. Note that this process may cause complications, so proceed with caution.
Conclusion
While there are multiple methods available for removing an MDM profile from an iPhone, we highly recommend utilizing MagFone iPhone Unlock for a seamless experience. This tool enables you to erase MDM restrictions on your device swiftly and efficiently. Importantly, you can perform this task without concerns about data loss on your iPhone during the MDM removal process.
One Comment
I would want to introduce myself to all of you because I actually enjoy reading the pieces that are regularly placed on this website. It carries pleasant things.