Summary: What should you do when you plan to extend C drive, clean up junk files, or wipe a partition for reuse? You will learn about a free partition software on this page to solve these problems.
Why need a free partition software?
As we all know, the experience of using a computer is not all smooth sailing. We always face some thorny problems, such as running out of space on the C drive, needing to clean junk files to free up space, deleting all data of the disk for reuse, changing the partition style of the disk, converting a basic disk to a dynamic disk and so on.
When there is no free partition software, you may resort to Windows built-in disk management software, including Disk Management, Command Prompt, DiskPart, Powershell, etc. But they do not always make us satisfied, because the built-in tools cannot get the job done under special conditions. At this time, the importance of free partition software is highlighted.
How to manage disk with free partition software in Windows 11 & 10
To manage disks in Windows easily and quickly, the most important thing you need is a reliable and free partition software. There are many products on the market, how to choose the correct one?
I highly recommend you to try AOMEI Partition Assistant Standard, a disk management expert for Windows 11, 10, 8, 7, Vista, and XP. It has many great features dedicated to solving various disk partition problems. You need to be aware that it has these characteristics:
- Safe: It does not bundle any malware and absolutely protects your personal data.
- Simple: It provides a graphical user interface that makes it clear to the user at a glance.
- Professional: Every feature is designed and tested by a professional team to ensure it solves user problems.
- All-in-one: It not only provides some basic functions, but also supports advanced functions, such as cloning HDD to SSD for free, rebuild MBR, convert data disk from MBR to GPT and so on.
Now, I will show you how this free partition software works:
Option 1. Extend the C drive
The C drive full often annoys us because it affects the performance of the computer. After running the free partition software download, this will no longer be a concern.
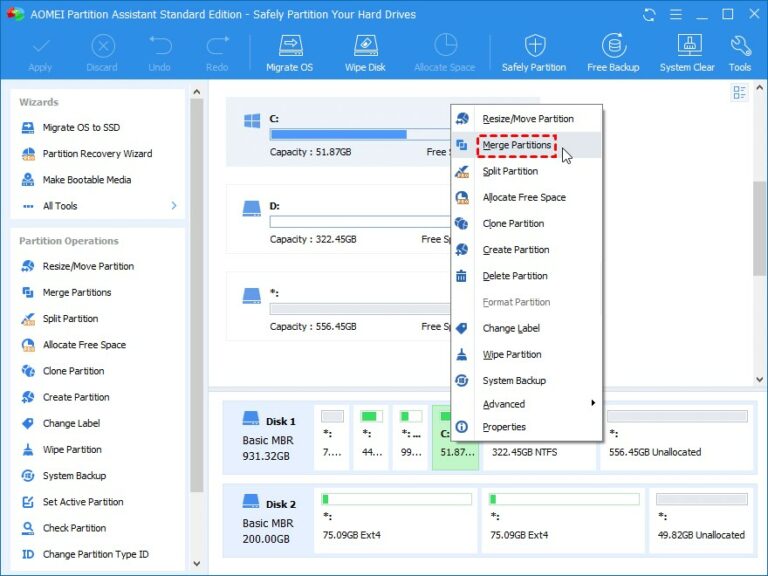
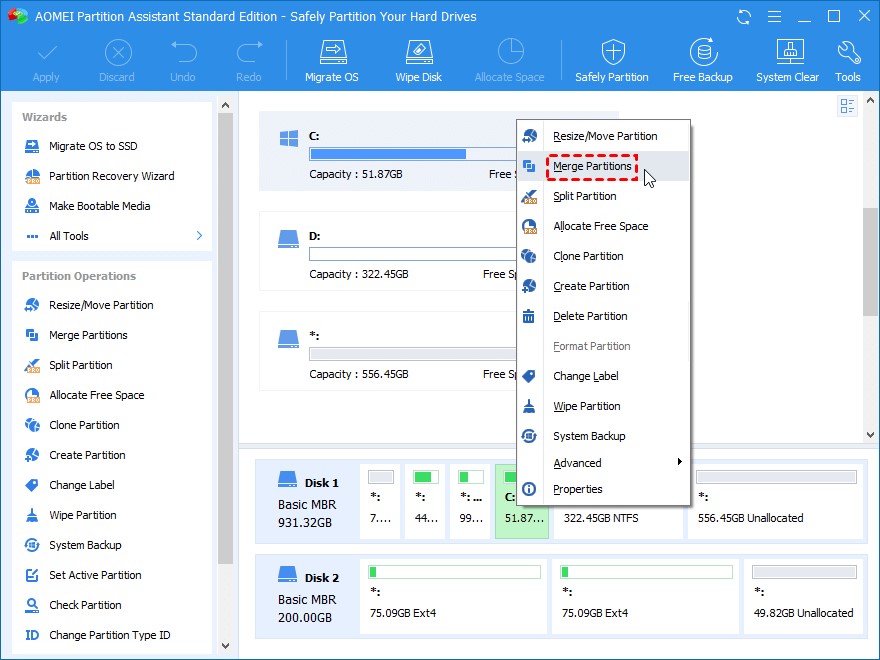
Step 1. Install and run it. In the main interface, right-click C drive and click “Merge Partitions”.
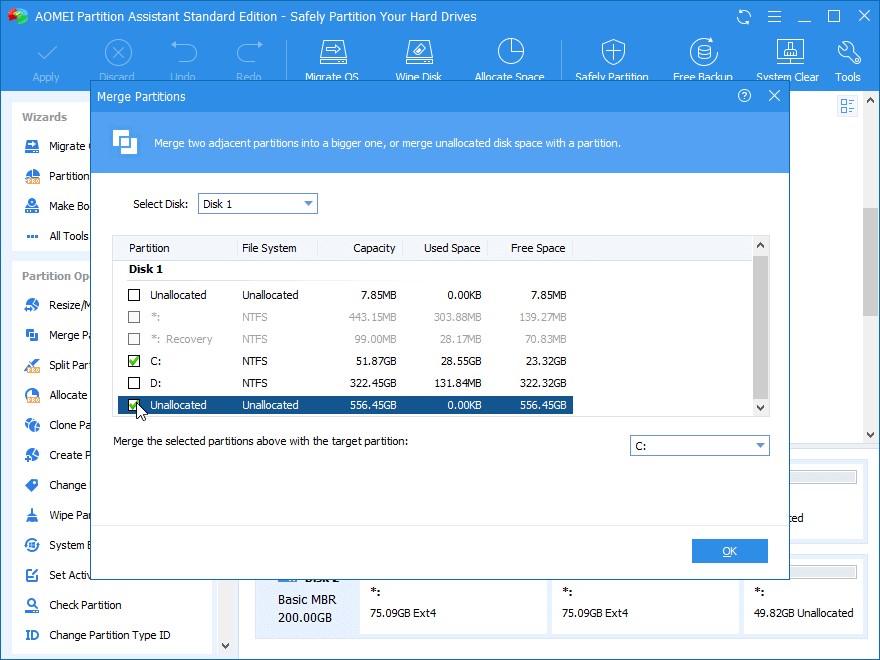
Step 2. Here, please tick the target C drive and an unallocated space. Even, you can tick C drive and another partition. Next, click “OK”.
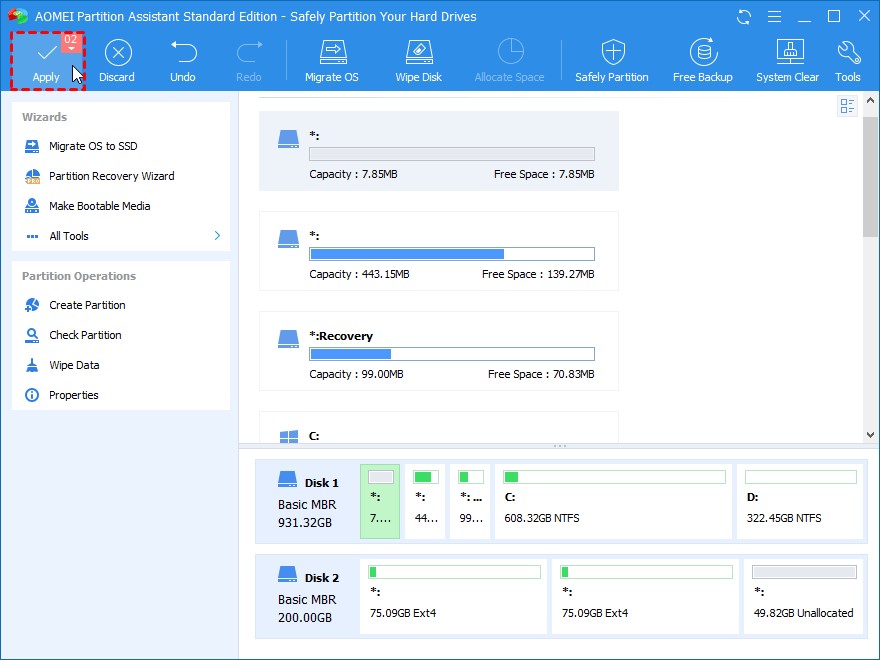
Step 3. Finally, you can see that the C drive has been merged with the partition or unallocated space you selected into one partition. Click “Apply” to generate the action.
Tip: You can try resize partition to shrink a larger partition to get unallocated space when there is no unallocated space.
Option 2. Clean up junk files
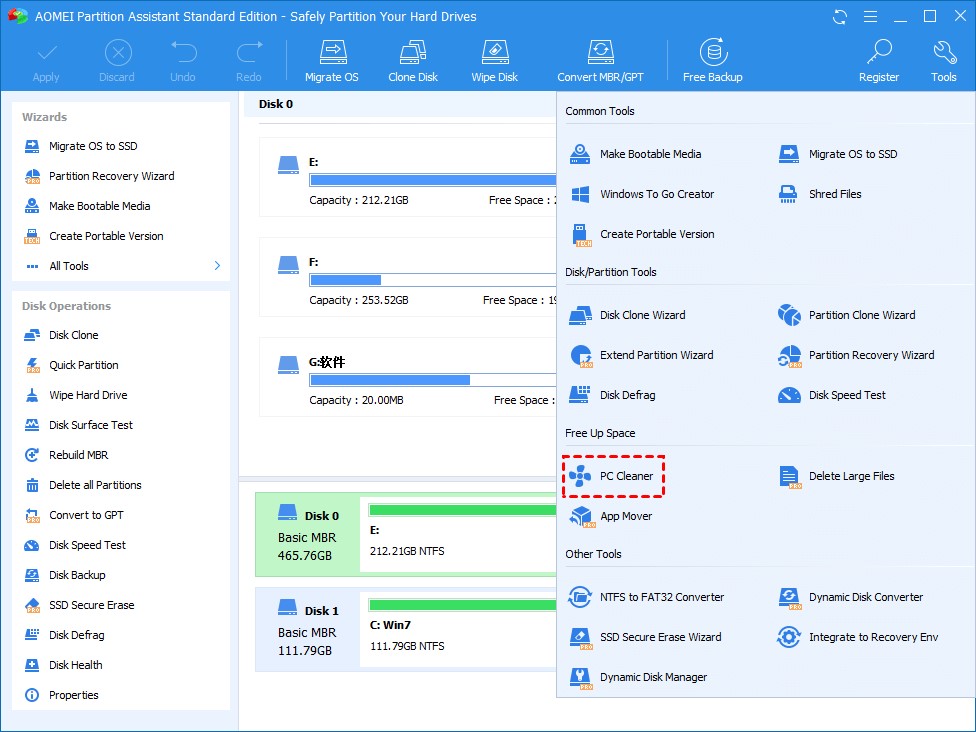
If you want to clean up the junk files in the disk to free up space, then you can choose to use the PC Cleaner feature, which will fully scan the junk files, including system junk files and registry junk files.
Step 1. On the main interface, click “Tools” and click “PC Cleaner”.
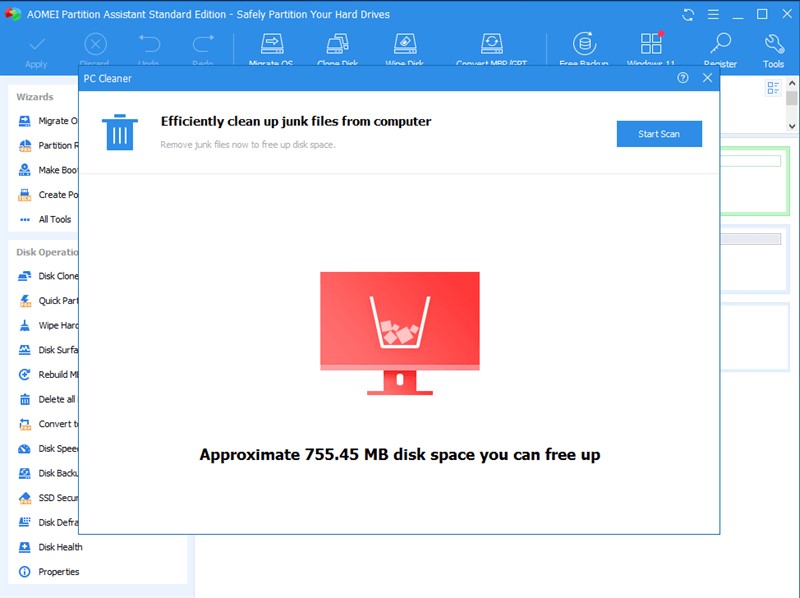
Step 2. Then, click “Start Scan” to full scan the PC.
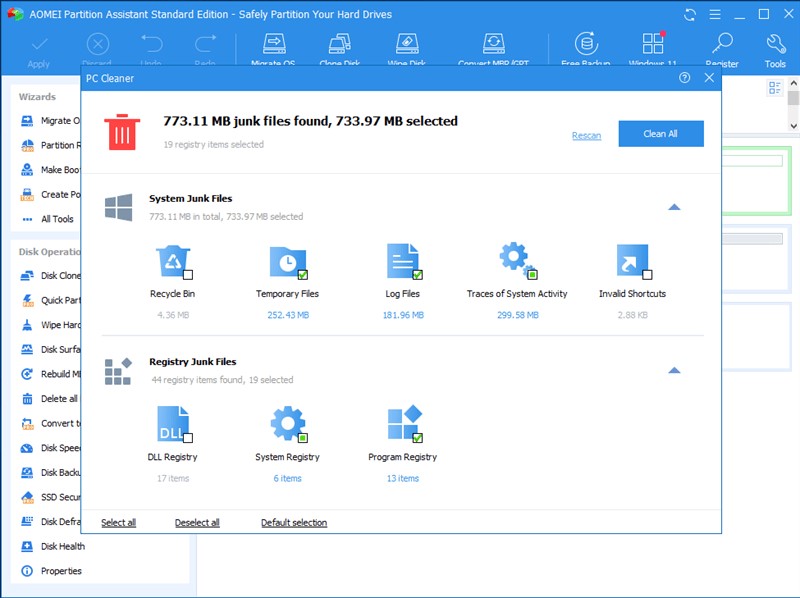
Step 3. After that, you will see the scanning result, some junk files will be selected by default. You can click “Click All” to remove these junk files permanently.
Option 3. Wipe hard drive
Are there any plans to sell the hard drive or throw it away? What can be done to ensure that personal data is not leaked? The Wipe Hard Drive feature can meet your needs.
Warning: Please note, please back up in advance if there are important data on the disk because the erased data cannot be recovered.
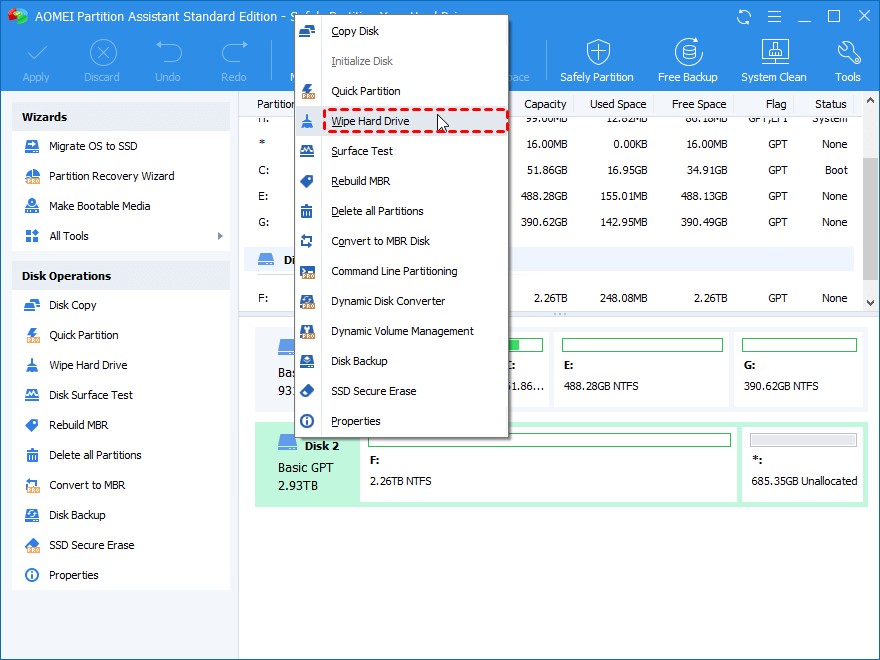
Step 1. Find the target disk, right-click the Wipe Hard Drive.
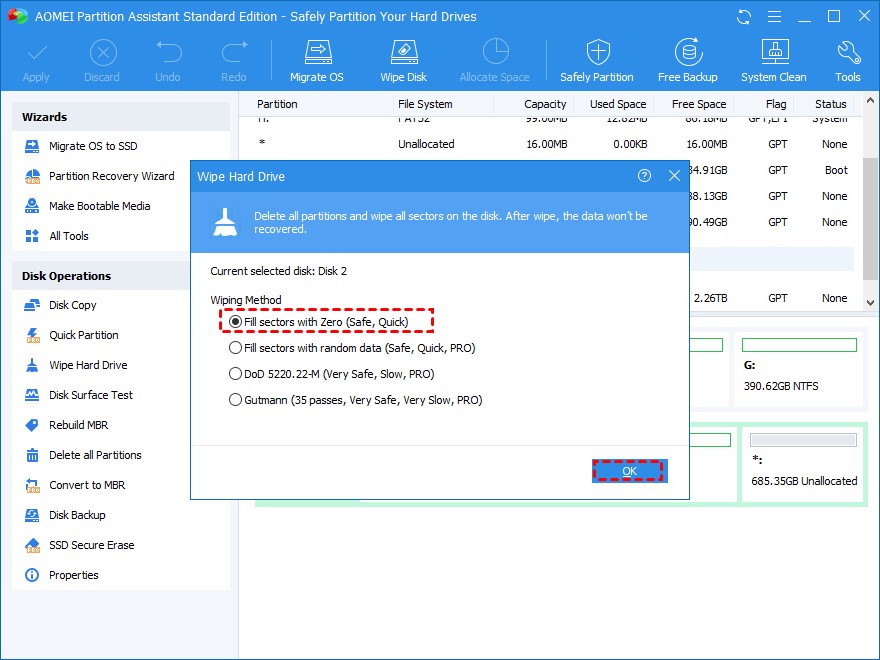
Step 2. Here are 4 methods to delete data, we choose “Fill sectors with Zero”.
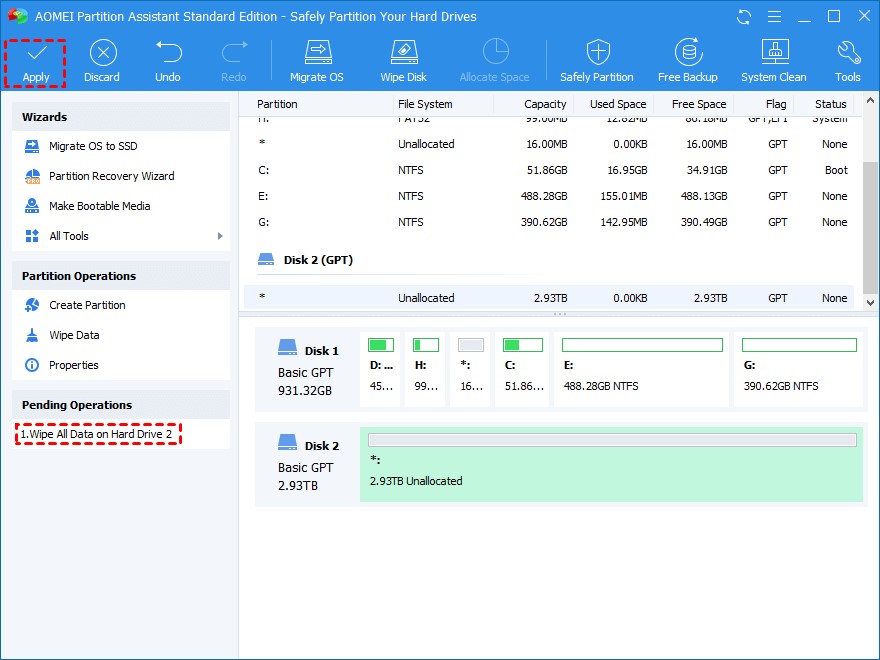
Step 3. Click “Apply” to submit the operation.
Bottom line
Did you see? This is how this free partition software work. With examples, I believe you already know how powerful it is. That’s not all, if you upgrade to the Pro Edition of this Windows partition manager, you can unlock more useful features. In addition, if you are running Windows Server 2022, 2019, 2016, 2012(R2), 2008(R2), 2003, you can turn to AOMEI Partition Assistant Server.
0 Comments