

Photography has come a long way since its inception. Today, almost anyone with a smartphone can take amazing pictures. And with the rise of social media, it has never been easier to share these photos with the world. However, before you tap the “share” button, it’s important to make sure your photos are properly edited. Sometimes you even need to remove the background from the image. We suggest you use Luminar Neo. This software can handle even the most complex photo editing with ease.
While retouching can improve your pictures, there are some common mistakes that people make. That’s what we’re going to talk about in today’s article. Let’s begin.
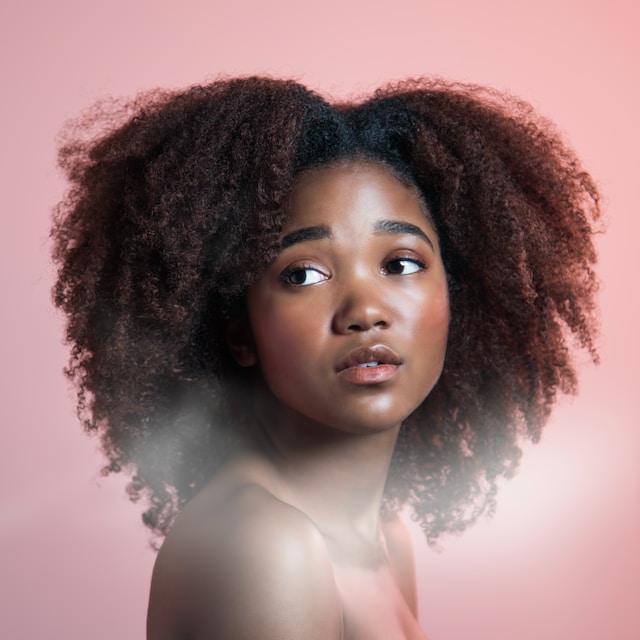
Mistake 1. Plastic and Blurry Skin
Process the photo carefully: leave freckles and moles, and carefully mask wrinkles. Don’t forget about skin texture and pores. They should be left after the portrait retouching so the face doesn’t look washed out.
Watch out for shadows and be careful. If you remove them all from the face, it will look unrealistic. Also, don’t forget about skin tone. Very often the photographer sets the wrong white balance while taking the picture. It makes skin look too yellow or red. A little color correction will fix that.
Mistake 2. Glowing Eyes
Making eyes brighter and more saturated can be a good idea. The main thing is not to go overboard. If the eyes are several times lighter than the rest of the image, and their color stands out from the background, you won’t get a successful portrait. Add brightness and pull up the saturation, but only a little and carefully. The gaze of the model is the most important and eye-catching part of portrait photography. It allows the viewer to make eye contact and understand the photographer’s idea. That’s why eyes have to look realistic.
Mistake 3. Retouching only the face
Of course, it is much faster to retouch just the face, but in that case, the photo will look incomplete. If the model’s neck, shoulders, arms, legs, or any other body parts are visible in the photo you need to pay as much attention to them as you do to correct the face. Don’t forget to retain texture and keep an eye on tone. Keep a close eye on all the details of the image. For example, to learn how to remove white backgrounds from images or get rid of unnecessary objects, read thematic articles, or watch videos.
Mistake 4. Too Much Saturation or Contrast
With any photo editing program, you can adjust the level of saturation and contrast. Just don’t raise them to the max.
Incorrect color correction can lead to low-quality shade displacement, destroying important details, creating visually distracting effects, or altering the mood of the photo.
Exposure and contrast correction can also have adverse effects. If the transition from highlights to shadows leaves no room for halftones, you can lose detail in your photo. To brighten highlights and shadows, you need to find a middle ground that doesn’t harm the depth and quality of the photo.
Mistake 5. Too Much Sharpness
It’s a simple rule in photography: if you get a blurred picture, and it’s not your creative idea, there’s nothing you can do to fix it. So don’t even try it. Sharpen to a modest degree on good-quality images. Use a variety of techniques, but do not overdo it. A lot of sharpening can ruin your work and make the noise in the picture more noticeable. You can find many online tutorials for proper sharpening in different photo editors.
Mistake 6. Creating Blur with Apps
Artificial blur looks bad and ruins the quality of your photos. If you can’t get the blur you want because of the depth of field on your camera, don’t try to create it with apps. It’s better to leave the background clear. If the model’s environment is not suitable, you can find a tutorial on how to remove the background from the image and use it. Or choose a different photo and work with it.
Mistake 7. Ignoring Details
Many applications offer batch image correction. This is a useful feature for professional photographers working with a large number of files. But you should not overuse it. If you don’t go into detail, you can miss defects in your photos for processing. There may be smudges, dust, or hair, unnoticeable in a quick review. Always zoom in on your photos and pay attention to details.

Bonus: How to Choose Photo Processing Apps
When it comes to choosing a photo editor, there are several key factors to consider. Here are some things to keep in mind:
- Purpose: Determine the purpose of the app, whether for personal or professional use.
- Functions: Consider the features you need, such as filters, cropping tools, color correction, and more.
- Ease of use: Look for an app that is user-friendly and has an intuitive interface. It’s also great if you can find tutorials on the internet. For example, you can find step-by-step instructions on “how to remove backgrounds from images in Photoshop“. This is very important when you are just starting out on your creative journey.
- Compatibility: Check if the software is compatible with your device and operating system.
- Cost: Determine your budget and look for a photo editor that is affordable or in your price range.
- Support: Look for a photo editor with good customer support in case you have problems or questions.
- Reviews: Read reviews from other users to get an idea of their experience with the application.
Now you know what to pay attention to first and what mistakes you should not make when processing photos. You can learn to retouch your pictures like a real pro. Luminar Neo can help you with this. The application’s interface is intuitive, so you can easily handle all the processing tools in the editor. Remember all the rules and good luck!
0 Comments